This simple change to your golf swing setup will make you a better golfer.
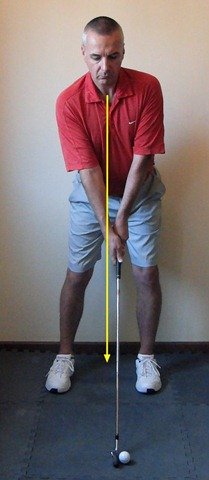
Much has been written about the importance of spine tilt (or secondary axis tilt) at impact, often referred to as the “Reverse K” position, but few people realise that correctly tilting your spine away from the target at setup is crucial for a great golf swing, and not just with your driver.
Once again, apologies to the lefties, for simplicity these instructions are given for a right-handed golfer.
When done properly, spine tilt at address provides a number of important benefits. It will:
- Dramatically simplify your golf swing;
- Enable you to maintain proper posture at address;
- Help you to get in a much better position at the top of your backswing;
- Provide more stability in your golf swing;
- Enable you to shift your weight without sliding your hips, you simply have to turn, thus stabilising your spine and avoiding the dreaded reverse pivot;
- Help you to get loaded up into your right side on the backswing, getting you properly behind the ball so that you can generate more power;
- Enable you to more easily get back your left side in the downswing, without sliding your hips;
- Shallow out your downswing and enable you to approach the ball more from the inside, coming into impact with a better angle of attack;
- Place less strain on your lower back.
In short, spine tilt at address sets the stage for a simple backswing, a great downswing, and a powerful impact position.
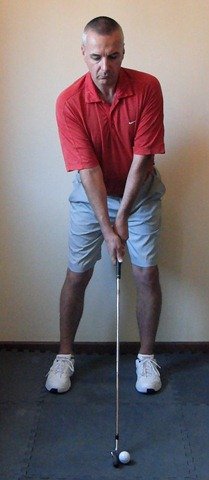
Figure 1. Correct spine tilt at address.
The amount of spine tile is exactly the same for all clubs for a standard full swing golf shot. The driver is a speciality shot that we shall discuss in another article.
The spine tile that you establish at address will remain constant in the backswing, and actually increase slightly in the downswing, as we shall see in later articles.
The more observant amongst you will have noticed that we teach you to maintain proper posture, with your spine in an anatomically neutral position, and with your shoulders depressed (dropped away from your ears) and your shoulder blades slightly retracted — see Golf Swing 101 – Setup: Basic Posture.
So how can you grip the golf club, with your right hand lower than your left, without moving out of proper posture? You don’t want to lift your left shoulder, or to twist your spine. The answer is spine tilt, and you establish the correct spine tilt as part of taking your grip and addressing the golf ball.
How to Tilt Your Spine Correctly
Establishing spine tilt at address correctly is very simple, once you know how!
If you are new to the Swing like a Champion system, please go back and carefully read the preceding setup articles, and work your way through the drills. These are prerequisites for achieving correct spine tilt.
To begin with, you should practise this without a golf club or ball. Perform this drill in front of a full-length mirror, if possible.
- Standing with correct posture, take the perfect stance width, perfect weight distribution and balance, and perfect spine angle.
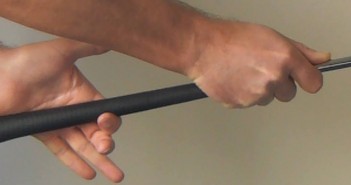
- Place your hands about 1” (2.5cm) apart, with your arms hanging relaxed under your shoulders, while remaining in correct posture — palms facing each other, the fronts of your elbows facing directly forwards.
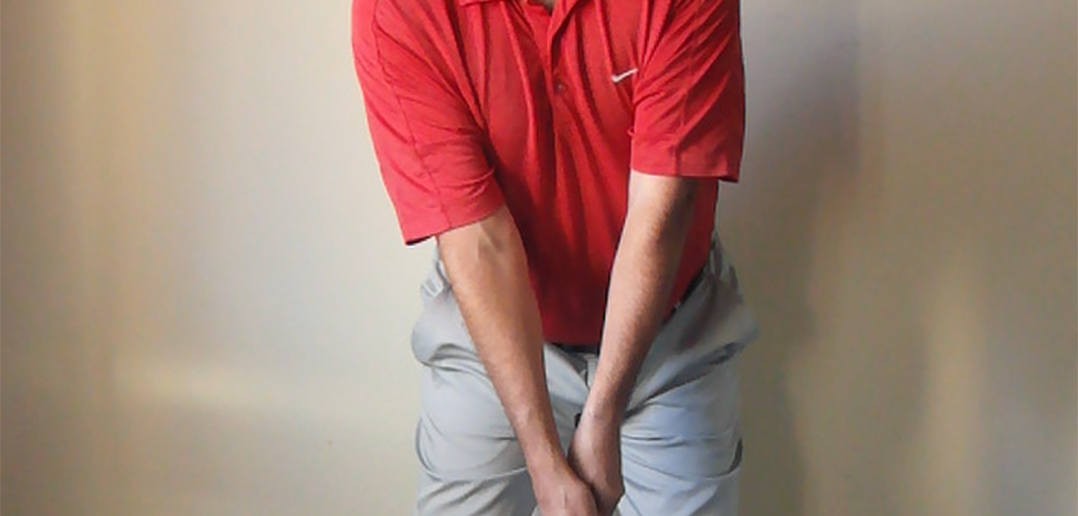
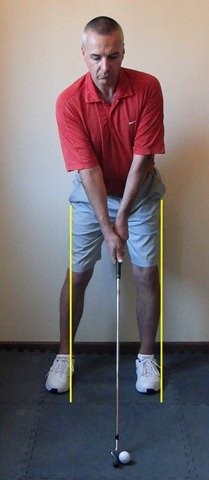
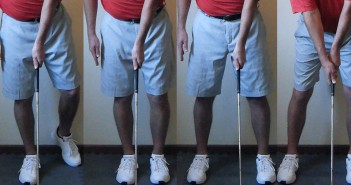
- Shift your hips a little to the left, towards an imaginary target, moving them approximately the diameter of one golf ball — see Figure 3.
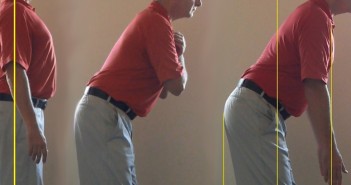
- As you do this, be very careful that your head stays still — see Figure 4. In actual fact your head will move very slightly as it tilts with your spine, and you keep your weight centred, but it will feel like it is staying still.
- Your weight must remain evenly distributed, 50/50 between the insides of your ankles.
- Make absolutely sure that your hips, shoulders, arms and eyes stay square to the target line.
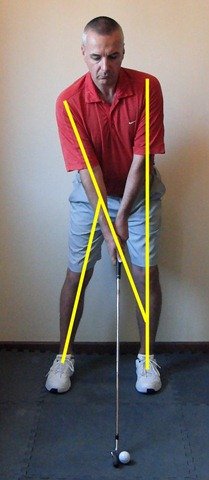
- This will cause your spine to tilt away from the target, while keeping your spine intact, in an anatomically neutral position — see Figure 2.
- If you have moved correctly, your sternum (the buttons on your shirt) will now point at the inside of your left knee — see Figure 5.
- Your hands will have moved slightly to the left, and your right hand will now be lower than the left, only slightly, but enough so that you could comfortably take your grip with your right hand while remaining in good posture — similar to Figure 2.
As you shift your hips, you will feel a tiny increase in pressure in your left hip, but no tension. The flex in your right knee may increase, and your left knee may straighten, but only very slightly.
As you perform this drill, keep checking your position in the mirror, making sure that your head doesn’t move significantly, and that you remain square to the target at all times.
Remember, you tilt your spine by gently shifting your hips to the left, not by leaning your upper body to the right.
Once you have a feel for it, perform the drill in front of a video camera. Check the position of your hips and sternum very carefully. You should see the same features in your position as shown in Figures 2 to 5.
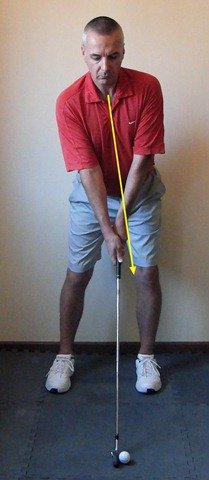
Figure 5. Sternum points at inside of left knee.
Use Deliberate Practice
Each time you perform this drill, remember what you learned about how your mind works in How to Learn a Great Golf Swing. Use deliberate practice, find somewhere where you will be undisturbed, and really focus. Move with your eyes closed sometimes, pause to feel if you’ve got it right before you look in the mirror. If it doesn’t feel right before you look in the mirror, estimate the error. If you didn’t get it exactly right, how is it different from the perfect position, and what does the error feel like?
As this address position becomes more natural, the feel, the feedback from your developing proprioception will change, so work through the drill again and again, in brief highly focussed sessions. Step away regularly and take your stance afresh, never just repeat drills mindlessly — it is not just about getting in the reps. Start working this drill into the other setup drills.
When you are ready, introduce a golf club and ball. Take your grip as described in Golf Swing Drill 104 – Setup: Taking Your Perfect Golf Grip. Setup with the perfect ball position (Golf Swing 102b – Setup: The Perfect Golf Ball Position).
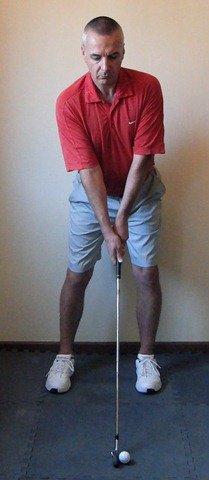
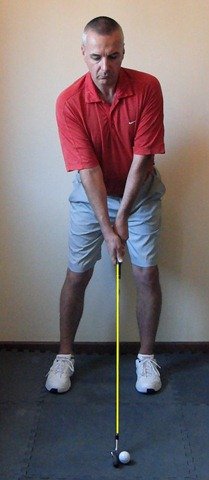
Tilt your spine as described above, and then place the club behind the ball. Make sure that the club face is perfectly square to your target, and the club shaft is vertical when viewed from face on — perpendicular to the target line — see Figure 6. More of this in Golf Swing Drill 108 – Setup: Addressing the Golf Ball.
Again, make absolutely sure that your hips, shoulders, arms and eyes stay square to the target line — avoid the temptation to “face the ball” as you place the club, but be careful not to overdo this thought and close your shoulders, either.
Keep your weight centred, and make sure that your head doesn’t move significantly, it is very easy to slip into the bad habit of shifting your head away from the target.
Make sure that your hips shift just enough to tilt your spine so that you can take your grip, while remaining in perfect posture. Be very careful not to overdo it. Just the width of a golf ball should do it, and your sternum should point at the inside of your left knee — see Figure 5.
Check your position in the mirror, and as regularly as possible using a video camera. You should see the same features in your position as shown in Figures 2 to 7.
Keep repeating this drill, again using deliberate practice, until the perfect position feels natural, you should soon start to feel uncomfortable setting up any other way.
If you have any questions or comments about this or other articles on Golf Loopy, please send us an email.
Okay, we’re almost there, just one small adjustment to your setup position, and you’ll have the perfect platform for making a great golf swing, as we’ll see in Golf Swing 106 – Setup: Distance from the Golf Ball and Arm Position.

