This drill will help you to quickly establish the perfect golf grip, so that it feels natural and comfortable, setting you well on the road to building the golf swing of your dreams.
This is the sixth and final article in a series describing the perfect golf grip, starting with Golf Swing 104a – Setup: The Perfect Golf Grip.
Once again, apologies to the lefties, for simplicity these instructions are given for a right-handed golfer.
This drill summarises the instruction given in the series in a step-by-step guide that you can follow when you are practising your grip. It is still important for you to read the whole series carefully to fully understand how the golf grip works.
Placing the Golf Club in Your Left Hand
To place the golf club correctly in your left hand, carefully follow the following steps:
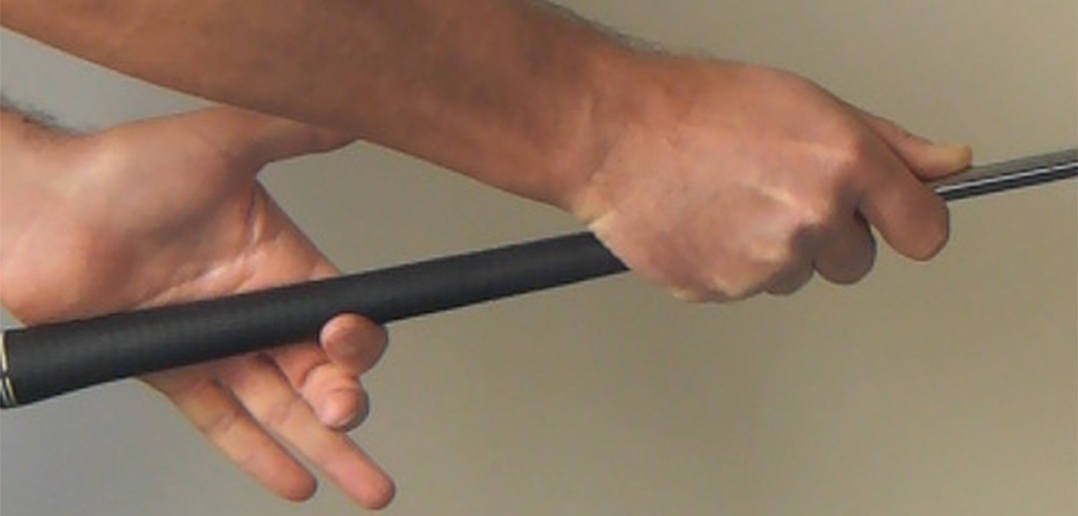
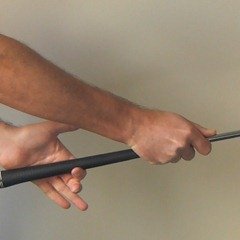
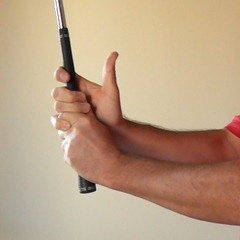
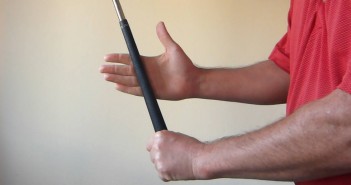
- Start by holding the club out in front of you, in your right hand at the bottom of the handle, with the club face exactly vertical (the grooves on the club face pointing straight up) — see Figure 1.
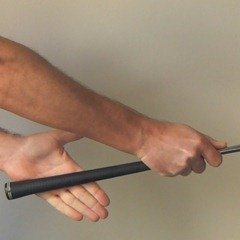
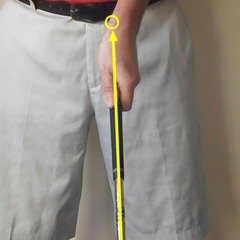
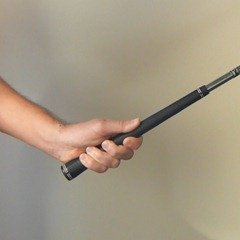
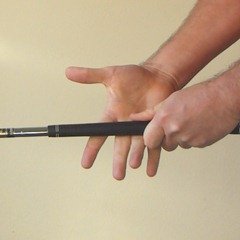
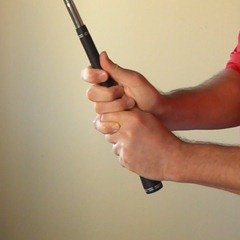
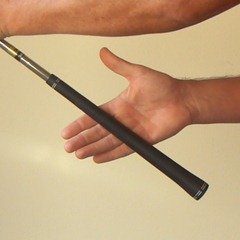
- Place the muscle bulge on the heel of your left hand (the hypothenar eminence) directly on top of the club, near the end of the handle — see Figures 2 and 4.
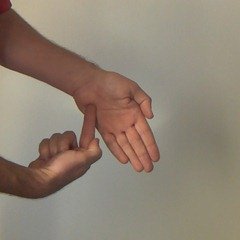
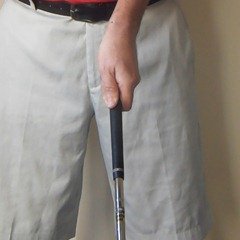
- The bony ridge on top of your wrist (the lower extremity of the radius bone) should be exactly over the centre of the handle — see Figure 3.
- Now place the handle diagonally across your lower palm so that it crosses the fleshy pad between the first and second knuckles (the proximal phalanx) of your index finger, and wrap the trigger of your index finger around the handle — see Figures 1 and 4. You should be able to support the weight of the club with just the heel pad and the trigger finger of your left hand.
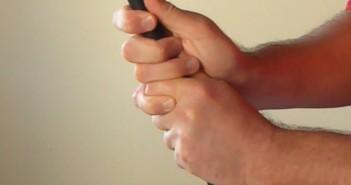
- When you close your hand around the handle, your three smallest fingers are primarily responsible for gripping the club — it will feel like you are gripping the club mostly with your little finger. If your club grips are sized correctly, the tips of your middle and ring fingers should just lightly brush the ball of your thumb (the thenar eminence) — see Figure 5.
- The trigger of your index finger should rest lightly around the handle, it is responsible for providing feel and should be free of tension — see Figure 5.
- Place your thumb slightly along the right side of the centre of the handle. It should rest lightly and be free of tension. Your thumb should be touching the base of your index finger, but not pressed firmly against it — see Figure 6.
- Hold the club up in just your left hand and check again that the club face is exactly vertical, and that the bony ridge on top of your wrist is exactly over the centre of the handle.
Placing Your Right Hand on the Golf Club
To complete your grip by placing your right hand correctly on the golf club, carefully follow the following steps:
- Start by holding the club up in front of you in your left hand, with your left arm bent at the elbow, gripping the golf club as described above, ensuring that the club face remains exactly vertical.
- Place the proximal phalanges of your middle and ring fingers on the bottom-right of the handle, with your ring finger snugly alongside the index finger of your left hand. Your hands should sit snugly alongside each other on the club handle, but don’t squash them together — see Figure 7.
- As you do this, either overlap or interlock your little finger (see Golf Swing 104c – Setup: The Perfect Golf Grip – Your Right Hand is Your Speed Hand).
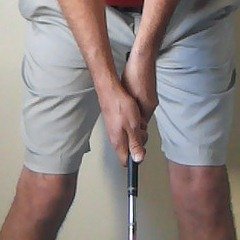
- Fold your right palm over the top of your left thumb, so that the left thumb fits snugly into the pocket formed by the life line of your right palm — see Figure 8. This should feel like a perfect fit. As you look down on your grip, your left thumb should be hidden completely — see Figure 10.
- Now place the handle in the trigger of your index finger. There will be a small gap between your middle and index fingers — see Figures 8 and 9.
- As you close your grip, the tips of your middle and ring fingers should just lightly brush the ball of your thumb (the thenar eminence) — see Figure 9.
- The proximal phalanx of your index finger should be across the right side of the handle. Roll the big knuckle at the base of your index finger up the right side of the handle a little, so that it feels slightly more on top of the club — see Figure 10.
- Place your thumb lightly along the left-top of the handle. It is responsible for providing feel and should be free of tension. Your thumb should be touching, but not firmly pressed against, the base of your index finger. The tip of your index finger will touch (or be very close to) the pad of your thumb — see Figures 9 and 10.
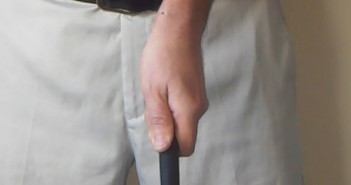
- The club handle will be running across the proximal phalanges of your index, middle and ring fingers — see Figure 11.
- Check once more that the club face is exactly vertical, and that the bony ridge on top of your left wrist is exactly over the centre of the handle.
Your completed grip should feel solid, secure, snug and compact. You should have a sense of the hands being unified, melded together as a single unit.
You will have noted that we have asked you to take your grip with the club held up in front of you, and with your arms bent. This helps you to ensure that your grip is exactly square to the club face — when the club is addressing the ball you won’t be looking straight down the club shaft. Also, you will need to adjust your posture slightly as you place the club behind the ball, as we’ll discuss next, in Golf Swing Drill 105 – Setup: Spine Tilt at Address.
Waggle the club and be very aware of the proximal phalanges of your middle, ring, and index fingers, as well as the big knuckle at the base of your index finger. Feel how energy is transferred to the golf club through these points, and work to develop your awareness of them, they will be of crucial importance as you build a great golf swing with the Swing like a Champion system.
As you waggle the club, also feel how loose you can make your wrists and forearms while still holding the club securely — foster that feeling in your golf swing.
After your waggle, check to make sure that the golf club hasn’t moved in your grip. Confirm that when you hold the club up in front of you, with the club face exactly vertical, the bony ridge on top of your left wrist is still exactly over the centre of the handle.
Note that, when you place the golf club head behind the ball at address, there will be some natural cupping (wrist extension) in your left wrist, and your right wrist will be flat — see Figure 10.
Practise!
Go fetch a golf club and try out the things we describe as you perform this drill, and carefully re-read the articles in this section a few times, starting with Golf Swing 104a – Setup: The Perfect Golf Grip.
Once you’ve understood the perfect grip, how and why it works, and you start to get feel for it, keep a golf club by your side, day and night if you can, and practise your grip as much as you can. Then practise some more!
Remember what you learned about how your mind works in How to Learn a Great Golf Swing. Use deliberate practice, really focus on the feel of the golf club in your hands, and of your hands against each other. Focus on each finger in turn as well as on your grip as a whole. Do this as you place each hand on the club, as you hold it still, and as you waggle it.
As you waggle the club think about how your hands transfer power to the club, about the pressure points on the fingers of your right hand. Feel the club lagging behind your arms, even with a such a small swing, focus on how you can feel that lag through your right index finger. Imagine the energy of your swing coursing through your wrists as they stay loose, imagine the whip cracking through impact.
Keep practising until your grip feels natural. This should only take a few days, though as we said at the beginning, it will take longer to unlearn the current compensations in your swing — the Swing like a Champion system will help you do that as quickly as possible.
Once you have perfected your grip, regularly check it carefully in the mirror, and on video, for as long as you play golf — the best players in the world check their grip carefully at least once a week, so should you.
If you have any questions or comments about this or other articles on Golf Loopy, please send us an email.
Okay, we now have our hands placed on the golf club correctly. There are a few crucial things that we need to consider as we place the club behind the golf ball, as we’ll see next in Golf Swing Drill 105 – Setup: Spine Tilt at Address.

