Making a full, powerful turn in the backswing is easy once you know how. We’ve never met a golfer, of any age, who couldn’t learn very quickly how to make a full shoulder turn using this drill.
Once again, apologies to the lefties out there, but for simplicity these instructions are given for a right-handed golfer.
First of all, let’s make it clear what we mean by a full shoulder turn. Most amateurs don’t understand it, it’s often not well taught, and this misunderstanding has ruined many golf swings.
The term “shoulder turn” is misleading. You can easily make what looks like a full turn by pushing your left shoulder under your chin and lifting your right shoulder behind your head. That’s a full shoulder turn, isn’t it?
Maybe, but it’s far from what you need to make a great golf swing. Pulling your shoulders out of posture this way might make it feel like you’re getting plenty of coil, but you’re “disconnecting” your arms from the powerful muscles in your core, making it impossible to efficiently transfer energy up the kinetic chain to the golf club. This will force you to try and “muscle” the golf club with your upper body. The result will be a weak, “armsy” golf swing that lacks power and consistency.
Another very misleading concept that is taught to amateurs is “turning your shoulders perpendicular to your spine”. Well, your spine isn’t straight, even when you’re in the perfect “straight back” posture, far from it. Your spine has several curves in it (see Golf Swing 103 – Setup: The Perfect Golf Spine Angle), and these curves must be positioned correctly to provide the required mobility for a stable, efficient and powerful turn. What’s more, although we use the concept of rotating around the axis of your spine, the curves in your spine will actually change during the golf swing, as we’ll see in later articles.
So, which part of your spine are you supposed to turn your shoulders perpendicular to? Many instructors simply draw a line through the shoulders, and another through the back at an arbitrary angle that isn’t directly related to any of the spine’s many angles, angles that are changing as the spine twists during the golf swing. They don’t teach you (they probably don’t know) how to actually move your spine for a more effective golf swing. Using the spine correctly is crucial for a great golf swing, but it’s rarely, if ever, taught — it’s one of those things that great golfers do “instinctively” that sets them apart. In this section, together with the transition and downswing sections, we’ll teach you how to use your spine correctly, and it will transform your golf swing forever.
Turn Your Back to the Target
What you really need to do is to make a full chest turn, turning your whole upper torso a full 90 degrees so that your back faces the target, and your sternum faces directly away from the target. When done correctly, this will create a high degree of separation (the “X-factor”) between your hips and your shoulders, stretching the large, powerful muscles of your core, generating lag and putting you in the correct position to execute a fantastic transition and downswing sequence. And, as you’re about to learn, you can do this easily while still keeping your shoulders in good posture, enabling the efficient transfer of energy from the core to the golf club.
We’ll stick with the term “shoulder turn”, because it’s in common use, but when you see this you should think “turn your back to the target with separation”.
As you’ll see in this drill, there is some independent movement of the shoulders, specifically right side scapular retraction (right shoulder blade pull), but both shoulders stay firmly connected to your core. Other shoulder movements will be discussed as you learn how to correctly move your arms later in this section.
We’ll see later in this section that a proper turn makes the backswing much simpler and easier to learn.
In the downswing section, those of you who are used to turning mostly with your shoulders, disconnecting them from your core, will soon find that a great golf swing feels effortless to you, as you stop “muscling” the golf club with your upper body and start letting the energy from your core flow into the golf club.
The vast majority of amateurs don’t make a proper full turn in the backswing. They don’t get their body in the correct position to use the full power of the large muscles in their core, and they’re then unable to initiate the proper transition and downswing sequence for power, accuracy and consistency.
Most golfers fall into one of the following four camps:
- Those who think they’re too inflexible to make a full turn. Perhaps that’s what they’ve been taught to believe. Well, as we stated at the top, we’ve never met a golfer who couldn’t learn how to make a full turn, and we’ve worked with thousands of golfers, aged from 6 to 96.
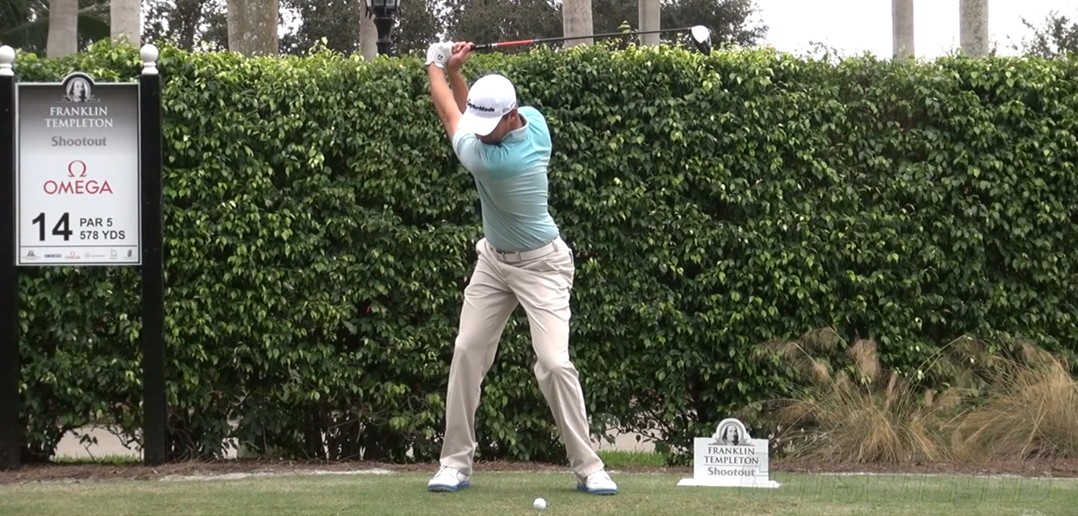
- Those who think they’re making a full turn, but all they’re doing is moving their shoulders independently from their chest, pulling and lifting them out of posture, as they swing their arms around their body. You can see in Figure 1 that the golfer has made a full “shoulder turn”, bit you can still clearly see the buttons on his shirt — his chest has only turned about 70 degrees.
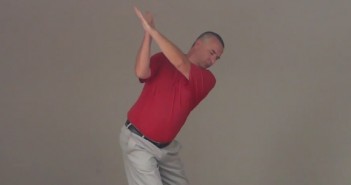
- Those who are making a full turn, but they’re turning their hips much too far in order to do it — see Figure 2. They’re not creating the separation needed for an effective transition sequence, and for using the powerful muscles of their core properly.
- Better golfers who turn their back to the target while generating plenty of separation, but swing their arms too far and become disconnected because they lose shoulder posture.
All of these faults are usually caused by golfers being taught to turn their left shoulder under their chin, but not being told how to do that properly. They end up reaching across with their left arm, lifting their shoulders and pulling them out of posture. Unless you’re very flexible, it’s really hard to make a full turn that way, and it creates a “disconnection” between your arms and your core that causes numerous problems and leads to inconsistency.
All of these golfers are losing power, accuracy and consistency. This drill, together with the rest of this section, will quickly fix all of these problems and give you a tour-calibre backswing.
The Drill
This drill is performed while standing upright, which will help you to gain the required muscle control and proprioception for a great backswing more quickly, by isolating the scapular retraction (right shoulder blade pull) part of the movement.
The drill assumes that you have been working through the setup and takeaway sections of the Swing like a Champion system, and that you are familiar with the golf mobility exercises.
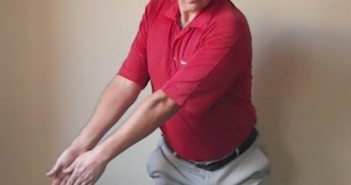
Figure 3. Making a full shoulder turn drill.
-
Stand upright, in good posture, with your feet parallel and the perfect stance width apart, your knees soft, just slightly bent.
-
Make sure that your core muscles are activated.
-
Balance your weight evenly between the insides of your ankles.
-
Cross your arms over your chest, the left on top of the right, your fingertips resting on the front of your shoulders.
-
Keeping your shoulders back and down, in perfect posture, turn your chest 45 degrees to the right by pulling the right side of your upper body behind you, using your obliques, rotating your torso around the your spine.
-
Keep your hips still as you turn to 45 degrees, as you practised in Golf Swing Drill 203 – Core Disassociation.
-
Now pull with your right shoulder blade, pulling it in and slightly down, towards your spine (scapular retraction).
-
Keep both shoulders in good posture, firmly depressed, and don’t shift your weight, tilt your spine, or move your spine away from centre as your chest rotates around it. Your spine is a fixed axis of rotation throughout.
-
As your chest is pulled around, your hips and pelvis will be pulled around with it. Try to move your hips as late and as little as possible, while not restricting your 90 degree turn, resisting the turn of your lower body with your right hip and your abdominal muscles.
-
Keep pulling until your back is facing the target.
-
Pause, check your position, and return to the start position.
At first, perform this drill in slow motion, in two distinct parts — first an oblique pull to 45 degrees with silent hips, followed by a shoulder blade pull with pelvic rotation (“hip turn”) to 90 degrees.
It is crucial that you stand in perfect posture, standing tall with your core activated, your tailbone dropped, and your shoulders connected, as described in Golf Swing Drill 101 – Setup: Perfect Posture and Connecting to Your Core. This will help you to turn properly, by putting your spine in the correct position.
Quiet Hips
You should feel as if your hips are passive, you are not trying to turn your pelvis, it is being “collected” and pulled around by your turning torso.
The feeling is that your hips and pelvis stay quiet as you begin the turn with your obliques, then they are pulled around a little as you start to pull with your right shoulder blade, then they reach the limit of their motion and resist as you continue to pull deep with your shoulder blade.
There is absolutely no need to lift your left heel off the ground in order to make a full turn.
You may find that you can turn more than 90 degrees, but don’t do that by turning your hips more than 45 degrees — the separation between your hips and shoulders is crucial. If you have above-average flexibility (this can be improved with our golf-specific mobility exercises), then you should be able to turn your shoulders by 110 degrees or more with only 45 degrees of pelvic rotation (“hip turn”), which is great, but a proper 90 degree turn with good separation (45 degrees or less of pelvic rotation) is good enough for a great golf swing.
As you gain confidence, try to blend the two parts of the movement into one fluid turn, but make sure that your hips stay fairly still until your chest has turned 45 degrees. This is difficult at first, like patting your head while rubbing your tummy. With a little practice, your muscle control and proprioception will improve and you’ll be able to do it without thinking.
If, when you blend the moves together, your hips start to move just slightly before your shoulders reach 45 degrees, that’s fine. Your hips should begin to move smoothly, and not be jerked into action. Try to move your hips as late and as little as possible, resisting the turn with your right hip and your abdominal muscles. As you improve, however, you should be able to move correctly without feeling too much tension in your hips — too much tension will lead to not completing your turn, and getting “too quick” as you fire too early at the top. It’s well worth putting in the time to work on your muscle control until you can get this move perfect without thinking about it.
At the end of the turn, you should feel a powerful coil in your middle and upper back as your right shoulder blade pulls hard and deep. Your breath will be a little restricted (because of the coil in your abdominal muscles). It won’t be particularly comfortable, but you shouldn’t have so much coil that you couldn’t hold the full turn position for several seconds. The real power of the coil will be generated in the transition.
You should have no sense of swaying or shifting your weight as you turn.
Your left knee will bend a little more to enable your pelvic rotation (“hip turn”), but it should not turn inwards – it should remain pointing forwards, to the left of the golf ball.
Make sure that you maintain the slight flex in your right knee. It should feel like your right knee stays completely still, pointing forwards, though it will move a little as your hips rotate. Keep your hips level.
Once you can turn your back to the target in one fluid motion, increase the speed of your turn gradually.
The Right Shoulder Blade Pull
When you pull with your right shoulder blade (scapula), try to feel like you have a handle attached to your shoulder blade, and that you are pulling that handle towards your spine, in and slightly down, causing your upper body to rotate around your spine. Your right shoulder is pulled behind your body as you turn, but you’re not pulling your shoulder blade backwards, you’re pulling it in and down, towards the middle of your spine.
You will feel this right shoulder blade pull (scapular retraction) mostly in your lats, which will engage as your trapezius and rhomboids pull your scapula in and slightly down.
Later, when you perform the right shoulder blade pull with flexed shoulders, raising your arms in front of your chest, the muscles of the rotator cuff will also play a part. These include the teres minor, supraspinatus and infraspinatus.
The multifidi are also involved in rotating and stabilising your lower spinal column (lumbar spine) as you turn.
The actual turn is still performed mostly by your obliques, but it’s helped by the increased engagement of the large muscles in your back.
As you approach the limit of your motion, you should also be able to feel your thoracic spine extending (your middle and upper back straightening), as you pull hard with your right shoulder blade, thus further increasing your range of motion and storing energy in your back that you will use in the downswing. For more information on this, and for some exercises that will improve your muscle control and the quality of your turn, see Fitness 301. Thoracic Spine Mobility for a More Powerful Golf Swing.
The shoulder blade pull serves several purposes — it enables a simple, perfectly centred turn, it stabilises the spine, it engages the muscles in the core, and it stores energy in your thoracic spine and rib cage — all of which are crucial in preparing for a great downswing.
Note that the scapula shouldn’t actually move very much, relative to the spine, it’s a subtle movement of only about 2” (5 cm). If you feel any discomfort in your back after this move, you are overdoing the movement. You will, however, feel like you’ve had a good ab workout after working on this drill.
You should have no sense of pulling with your right elbow — the pull is with the right shoulder blade, never the right arm.
Don’t Push
Make sure that you do not push with your left shoulder at any point. Both shoulders should remain connected and passive, the movement is made by pulling inwards with your right side, towards your spine — first with your obliques, and then with your right shoulder blade.
The entire movement is made by pulling with the muscles of your right side. You will not feel any push at all. In reality the two sides of your body work together, but the feel is 100% right side pull.
You should have no sense of reaching around with your left shoulder — be vigilant for any pressure against your right fingertips, which would indicate that your left shoulder is pushing. Fight this by keeping your left shoulder firmly back and down, in perfect posture.
Head Turn
Don’t worry about letting your head turn in this drill, up to about 45 degrees, but it shouldn’t sway to either side. As you progress, try to turn your head a little less — we’ll focus on this a lot more in Golf Swing Drill 303 – Backswing: Full Shoulder Turn with Weight Shift.
It is very common for golfers to try to keep their head still, because that’s what they’ve always been taught. They try to do this, avoiding the sensation that their head is swaying, by trying to keep their eyes still as their head turns — this will tilt your head, and it’s a recipe for disaster with the dreaded reverse pivot.
Unless you’re freakishly flexible, you can’t make a proper full turn without turning your head. It is very important to learn the feeling of your head shifting slightly, a feeling caused by your eyes moving as your head turns, even though your spine (the base of your neck) stays perfectly centred.
Don’t try to keep your head still. Instead, keep your spine centred, and let your eyes move slightly as your head needs to turn. Check on video that your spine is staying centred.
Practise Deliberately
Use deliberate practice, find somewhere where you will be undisturbed. Put your “game face” on. Laser focus.
This can be a difficult drill to perform correctly, at first. You’ll want to move your hips too soon. It can get frustrating. Remember that you learn fastest when it’s a struggle, when you’re reaching, when you’re making mistakes. Embrace it.
Work in front of a mirror as much as possible, from both face on and down the line. Also use a video camera as often as you can.
Perform the drill with your eyes closed, sometimes. Focus intently on the feeling of your muscles pulling your torso around.
What does your body feel like when you have proper separation between your hips and shoulders? What does it feel like when you don’t get at least 45 degrees of separation?
Check very carefully that you are not shifting or tilting your spine, or tilting your head, as you turn.
Make sure that the turn of your hips doesn’t begin until your shoulders have turned about 45 degrees, and that your hips haven’t turned more than 45 degrees at the end of your turn.
Be extremely sensitive to any push from your left side.
Learn what it feels like to get it wrong, as well as correct. Train your proprioception.
Your goal is to quickly get to the stage where you move correctly by default, without thinking about it, and any mistakes you make will feel “wrong”.
If you have any questions or comments about this or other articles on Golf Loopy, please send us an email.
Next up: we’ll take the full turn to the next level, improving the quality of the turn even further, turning around a tilted spine and properly shifting our weight, in Golf Swing Drill 303 – Backswing: Full Shoulder Turn with Weight Shift.


