This drill will teach you how to develop the perfect posture for the golf swing; giving you more power, accuracy and consistency, while reducing stress on the body.
Perform each of the following steps in the order given. Each time you perform this drill, you should strive to develop a heightened, focused awareness of your body, specifically your balance and the feeling of having an active, connected core with your muscles relaxed but engaged.
Legs parallel and hip distance apart
Stand with your feet directly under you, a few inches apart. Toes and knees pointing forward, feet parallel.
Feel the bony part of your hip bone that sticks out in front with your index fingers. Move your fingers approximately 2 finger-widths inside of that (this will depend a little on how much your hip bones flare open) and shuffle your feet until you can draw a straight line from your fingers down through your knee, ankle, and foot.
Refine this position by shifting your weight slightly forward and back and side to side. Adjust your feet until you feel a place where the legs feel balanced, and you have a sense that your weight is falling directly down through your legs into the floor.
Move your fingers, if necessary, so that they are directly over the centre of your ankles and knees. Make a mental note of this position, it is the centre of your hip joint.
Don’t lock your knees, let them be a little bit soft.
When you get it, it feels “right.” Your feet will not be touching, nor will you have a stance as wide as the flesh of your hips.
Balance your weight
Balance your weight so that it feels like it is falling directly through the middle of your feet.
With your eyes closed, rock slightly forward onto your toes, then back onto your heels, repeat this motion several times, making the movement smaller and smaller until you feel your weight is balanced over the centre of your feet, the front of your ankles.
Activate your core
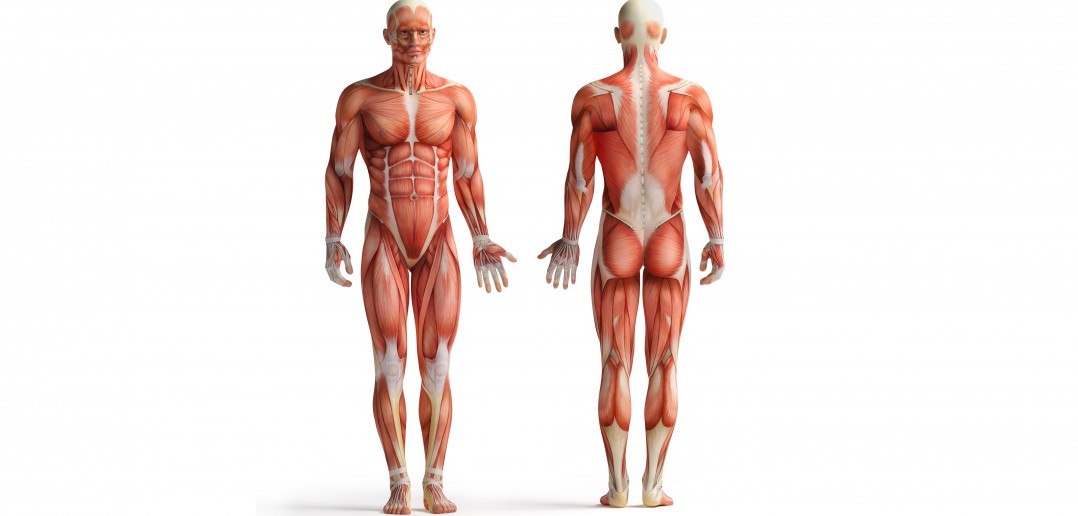
Activate your core muscles by lightly pulling your abdominal muscles in and up.
Start by engaging the pelvic floor muscles. You should feel like you are pulling the pelvic floor up and in towards the centre line.
After the pelvic floor is engaged, the actual pull-in begins just above the pubic bone and becomes a deep pull-in of the lower abdominals. From there, the pull-in action progresses upwards to pulling the belly button to the spine, and then the upper abdominal area. From there, some people find that they can get an extra upward lift of the abdominals; this is a true scoop of the abs.
These moves are not as obviously sequential as they may sound, but a bottom to top awareness is the best way to practise engaging the abdominal muscles properly.
The pull-in is not just from front to back, but also from the sides of the trunk.
As the abdominals pull in, it is essential to maintain both length and breadth in the back as the muscles are challenged to counter the pull of abdominals.
Pulling the abs in is done with a neutral spine. That means that the natural curves of the spine are present and the pull-in does not create a forward flexion of the upper spine, or a tuck of the pelvis.
You are looking for a feeling of “aliveness” in the core.
Drop your tailbone
Activating the core will allow you to drop your tailbone down towards the floor. Imagine that your pelvis is a bowl of water and you don’t want the water to spill out to the front or the back.
Open your chest
The chest is not caved in and not thrust out, just resting easily. There is a small point at the bottom of your sternum, and that, like the tail bone, should be pointing straight down.
Shoulders down, broad back
Allow your chest to drop and open as your back expands.
Depress your shoulders, letting them drop down away from your ears, and let your shoulder blades slide down your back.
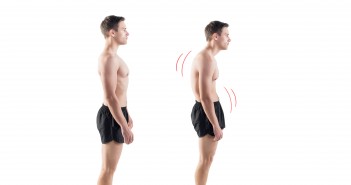
The fronts of your elbows (the antecubital region) should face directly forward and the palms of your hands face inwards, towards your thighs, when your arms are relaxed. Palms facing backwards are a sign of forward shoulders and instability in the shoulder joint — a common fault in people who work at a desk. If necessary, retract (adduct, move backward towards the midline of the body; moving the scapulae back towards the spine) your shoulder blades slightly to achieve this, while maintaining a broad back. When you protract your shoulder blades and get into poor posture, the fronts of your elbows will face inward (internally rotate) and the palms now move in front of, and face the front of, your thighs. This position is extremely common and not only leads to common swing faults such as crossing the line at the top but can also lead to injuries of the elbow and shoulder.
Feel that your shoulders are connected to and supported from your core.
To become more aware of this feeling, shrug your shoulders straight up towards your ears, hold for 2 seconds, then depress them, pulling them straight down as if you’re reaching towards the ground with your fingers. As you pull down, feel your shoulder blades slide down your back. Make sure your palms are facing inwards. You should feel relaxed but solid and engaged, your shoulders connecting to your core through your traps and your lats. Repeat this five times with your eyes closed, focus on the feeling that your shoulders are connected to your core when you depress them. Then relax, but maintain that “connected” feeling.
See Why is Having the Shoulders “Connected” So Important?
Ears reach for the sky
Imagine that the tops of your ears are reaching for the sky. Your gaze is straight forward, with your throat open and chin resting naturally.
Your head and neck are completely supported by your core and easily float above your shoulders.
Posture check
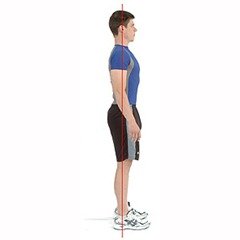 Look in a full-length mirror from down-the-line (from the side). Your body will line up such that you could draw a straight line running vertically through your ankles, knees, hips, shoulders, and ears.
Looking in the mirror face-on, your shoulders will be level with each other, your kneecaps will point straight ahead, and your feet will be parallel. Your could draw 2 straight lines running vertically from the centre of your ankles, through the centre of your knees, up to the centre of your hip joints.
Though some of this may feel awkward at first (most of us are used to having poor posture), you should ultimately feel energised, alive, connected, but relaxed and free of tension.
We suggest going through this posture check as many times as you can during the day. It is an especially good exercise to do once you are warmed up, or even after exercise, when your awareness is heightened and your core is well engaged.
Try to develop a keen awareness of the position of the middle of your hip joints, and the position and feeling of your shoulders when they are “connected”. These are vital for an effective golf swing, as we’ll see later.
If you have any questions or comments about this or other articles on Golf Loopy, please send us an email.
Next: Fitness 101 – Golf Mobility Exercises for Perfect Posture at Address.

